How to make World-class caricatures
We love seeing caricature avatars of people, caricatures are kind of fascinating to see. In simple words a caricature imitation of a person/character in exaggerated comic effect. Some people also call it cartoon versions of humans. A caricature captures the essence of a person’s personality. A customised caricature concept is a good option to gift someone. But today you have an exclusive chance to win personalised caricature Avatar free from Shubh Vivaah. To participate in this contest follow this link Instagram and do the needful.
Since so many of you have asked us about our secret caricature making process, this blog is just for you.
And at Shubh Vivaah we believe that every wedding is special thus we make sure the caricature Avtaar reflect you in the best possible manner along with a spectacular caricature wedding invite.
Making caricatures is a time-consuming process. Read about it in detail below.
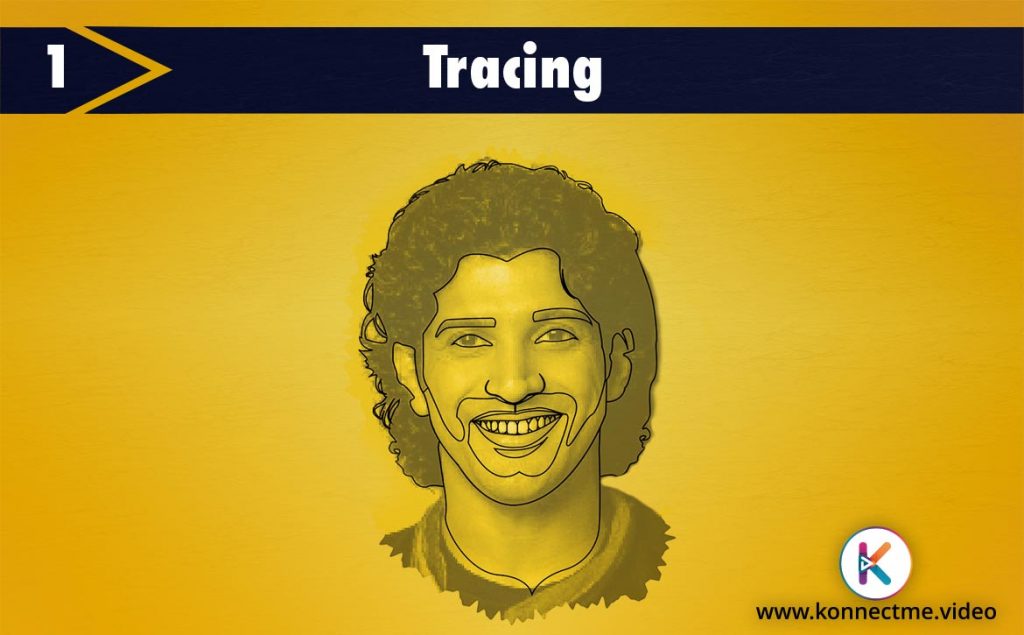
1. Tracing
If you’re working from reference then choose a high-quality large photo and ensure that the photo has good lighting with clear facial features. Now comes the first step of creating caricature i.e tracing. For that determine large shapes that define the subject. You can start with the subject’s face, such as eyes, nose, and mouth. Work quickly and keep drawing basics.
Creating a rough outline of objects will make it easier for you to emphasize some shapes and fill in details.
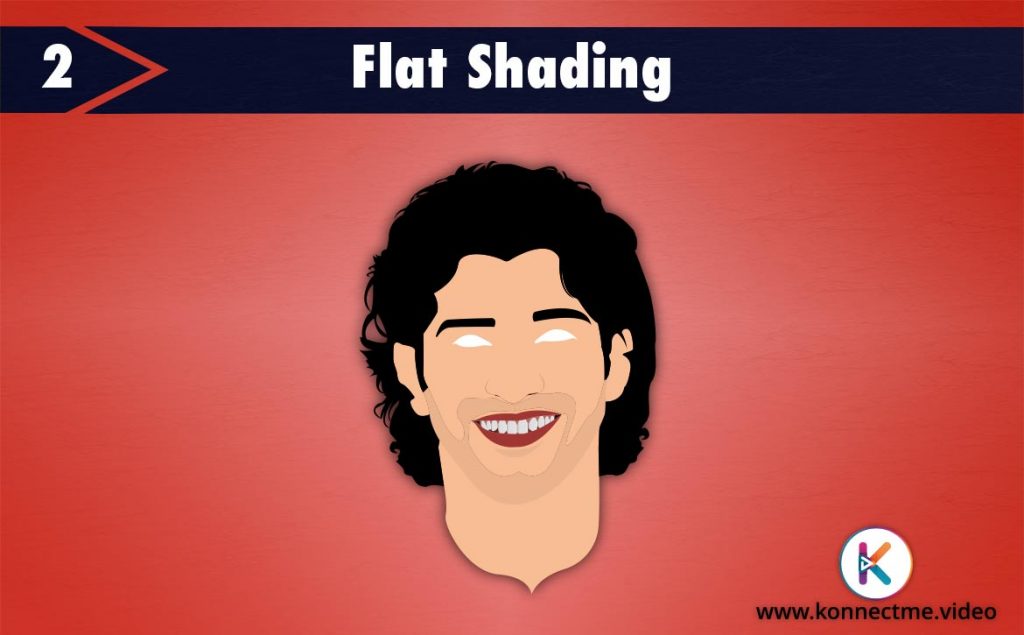
2. Flat Shading
To fill in the dimensions of your subject add shading. Flat shading is about adding colours in basic shapes. This can seem tedious and time-consuming. Continue adding colours to fill in the dimensions and large shapes of your subject. Don’t touch detailed shapes in this step like eyes and pupils.
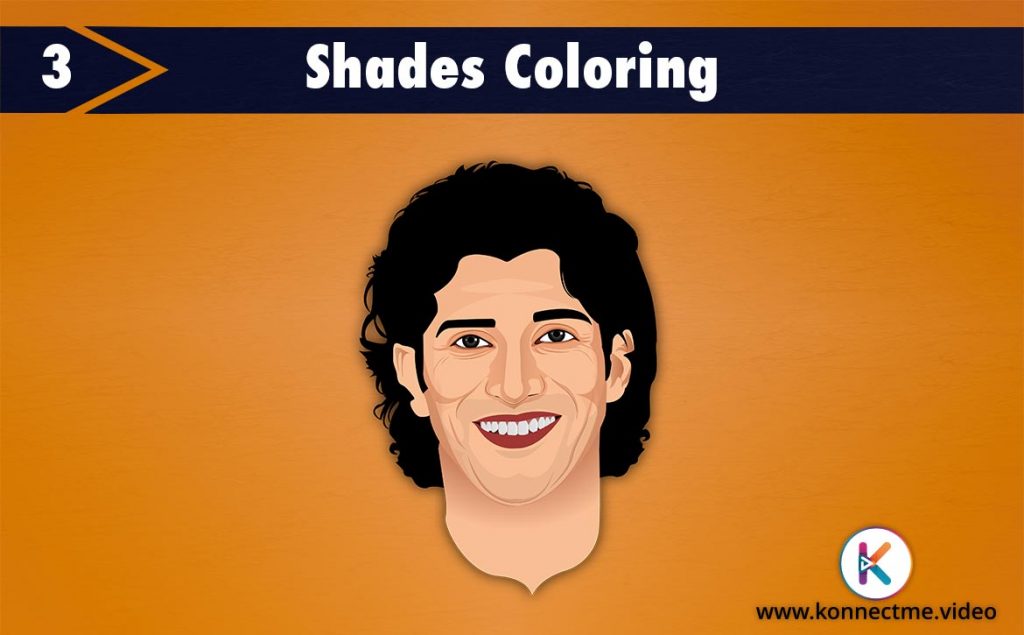
3. Shades Colouring
In shades, colouring colour changes from pixel to pixel. Shades or shadows are caused by the two or more subjects blocked in the path of light. This depends on the angle from which the light is coming and the surface upon which the shadow falls. Shadows can vary based on the intensity of the light and the tone of its background. Identifying the objects effectively gives strength and colourful tone to a picture. It can be the underside of the jaws, below the lower lip, and under the ear-lobes are other shadow areas. We have a pro tip for shades colouring to keep the shading towards the edge lighter this will make the shadow on the ground stand out effectively.
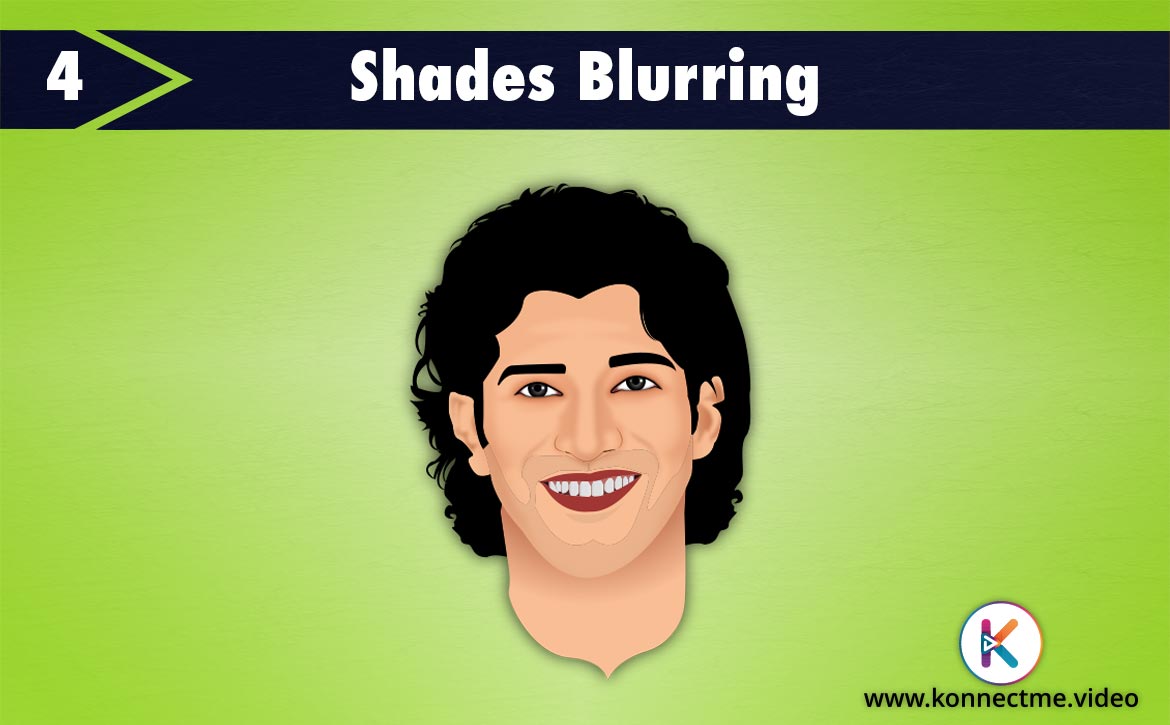
4. Shades Blurring
To make your picture look uniform, shades blurring is an important step. Blur the lines in a hatched or cross-hatched area so that the darkness looks uniform even when looking at the picture close up. This blending technique is about evening out or graduating values and colours. Before that identify colour tonnes well for example first tone, second tone etc. Always start your stroke from the darkest value and move outward and blend in circles or back and forth.
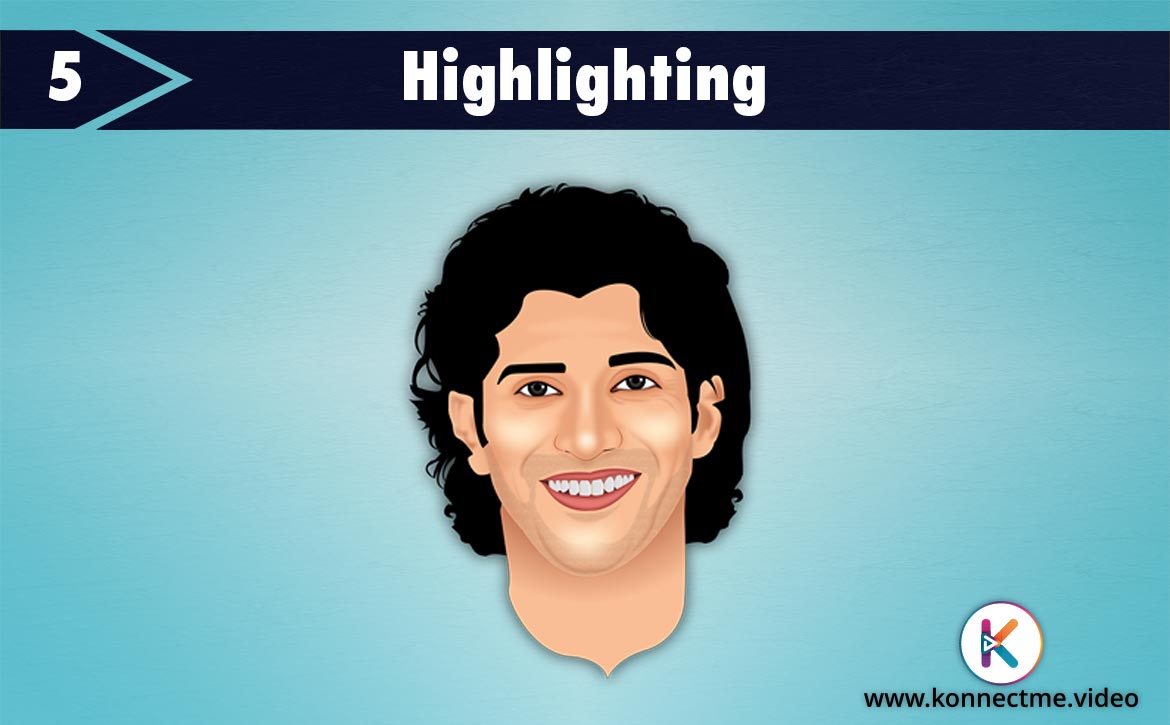
5. Highlighting
Highlighting involves liquifying major facial features, with highlighting you can give a person a new look by changing eyes, mouth, and other facial features. This step can enhance your portrait. In a straight looking portrait you can highlight cheeks, the tip of the nose and the lower jaw. Because when the light comes straight these parts of the face kind of shine in the light, you can highlight them in white, golden or with the lighter shade of the skin tone
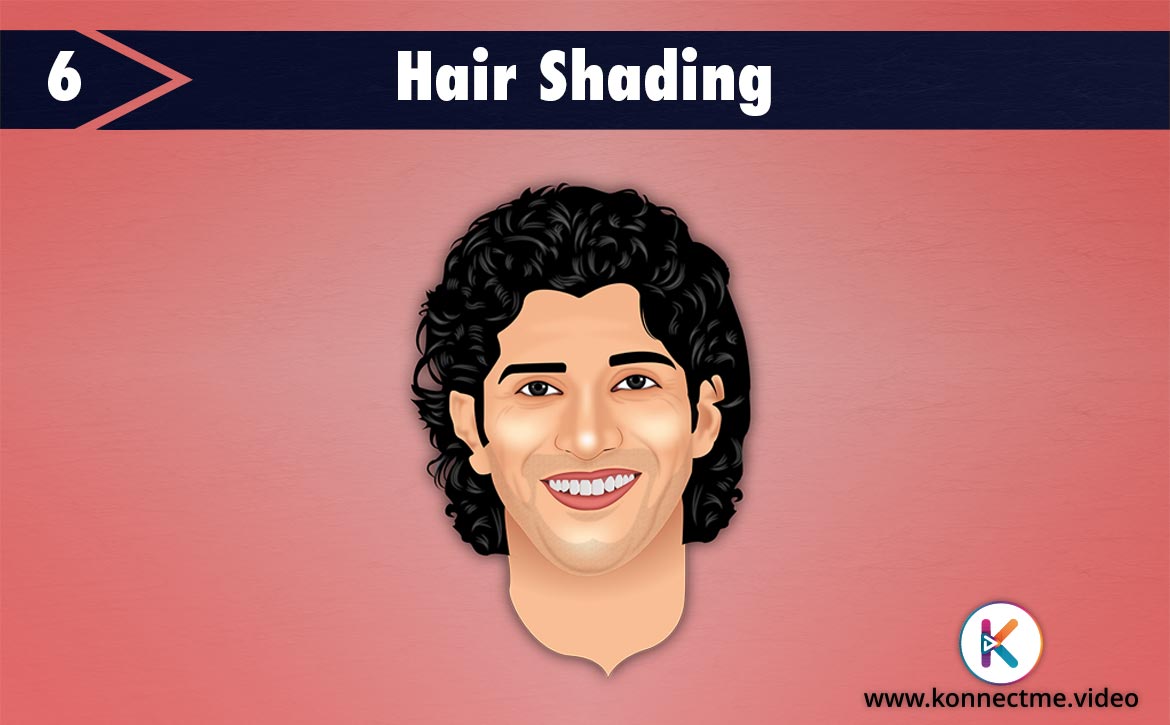
6. Hair Shading
Hair and eyes are often used to express emotions and a character’s personality. But you can’t simply draw all the hairs in the form of lines. Start by adding some volume around the head, define what hair type you’re drawing, it can be long, short, straight or curly hair. Draw the hair parting if there is any, and don’t forget the outline of the hair around the face. Outline the whole hair, following the rhythm of hair strands and yes. add some random hair stray here and there to make it look more realistic.
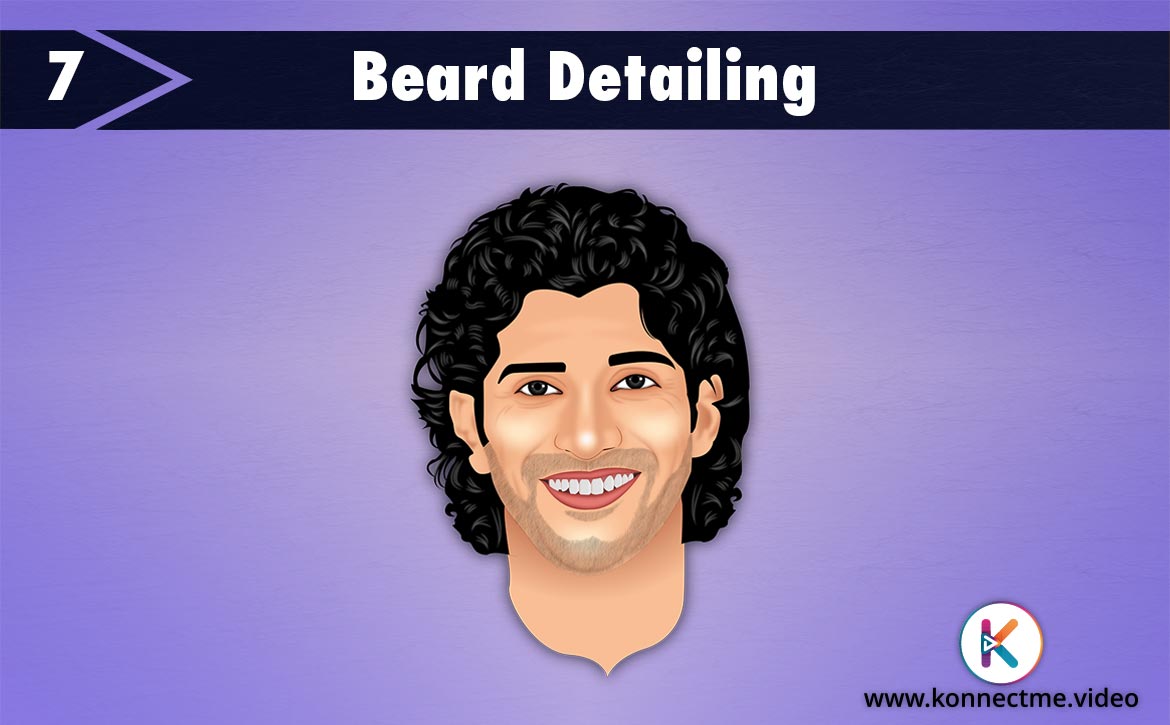
7. Beard Detailing
Start by outlining the facial area in which you want to draw a beard. Use a series of long and short curved lines, noting the jagged edges at the cheeks and above the brow and near the jawline. You can make a U shaped or V-shaped beard, but in the case of a reference image, you need to follow the shape of the given portrait.
Beard detailing also involves lips and upper lips contouring. You can add 2-3 colour tones to exaggerate and make it more realistic. You can add the small hair linings and strands with the brush tool. Just like with the skull hair, there are darker and lighter shades of the beard, depending on where the light’s direction and how the hair growth differs across the face.
We hope you enjoyed reading this blog and we hope it has been helpful for you. For more inspiration on caricature check out our portfolio
https://instagram.com/shubhvivaahvideo However the more paintings you create, the better an artist you’ll become! If this seems an exhausting and time-consuming task let us know about your caricature creation requirements because we specialise in making caricatures, humorous illustrations, cartoons and caricature invites. Remember, some things should be left to the experts only.

 The benefits of using 3D animation for your business.
 How Videos Improve Training Engagement
 Learn how to boost B2B strategy with animated videos
 How Animated Videos Help Save Paper and Promote Sustainability
 Mastering the Art of Memes and GIFs: A Playful Guide to Effective Marketing
 How to use video to drive traffic to your website
 How to Choose the Right 3D Animation Studio for Your Business
 How to Use Explainer Videos to Build Your Brand